
 Campaign
Campaign is an email marketing plugin built specifically for Craft. It aims to bring the distribution of content by email into the CMS – where we believe it should be – along with the same ethos of flexibility and user-friendliness that Craft does.

Listen to an interview with Philip Thygesen of Boomy share his experience moving a jobs website from Wordpress and Mailchimp to Craft and Campaign.
Watch the demo video:
Features #
Element Types
Campaigns, contacts, mailing lists, segments and sendouts are all element types. Composing your email campaigns and pulling in existing content is a cinch with custom fields.
Real-time Reports at your Fingertips
Detailed reports about your campaigns, contacts and mailing lists are available in real-time, right in the control panel.
Complete Control with Twig Templates
Complete personalisation of emails using Twig templates and variables. Design email templates for your specific site’s and client’s content needs.
Contact Management
Manage your contacts just like users. Import and export contacts easily from and to CSV files. Bounce and complaint handling is built-in to prevent email blacklisting.
Powerful Contact Segmentation
In addition to mailing lists, you also have fine-grain control over your contacts with segments. Segments are sets of conditions that filter contacts by specific fields, operators and values that can contain an unlimited amount of AND/OR conditions.
Pro Edition #
The following features are available exclusively in the Pro edition of Campaign:
- Segments – conditions that filter contacts by specific fields, operators and values
- Automated Sendouts – delayed sending of campaigns to mailing lists
- Recurring Sendouts – recurring sending of campaigns to mailing lists
- Singular Sendouts – sending of campaigns to specific individual contacts
- User Group Sync – synchronised mailing lists with user groups
License #
This plugin requires a commercial license purchasable through the Craft Plugin Store. The license fee for the Lite edition is $149 plus $59 per subsequent year for updates (optional). The license fee for the Pro edition is $299 plus $99 per subsequent year for updates (optional).
Requirements #
This plugin requires Craft CMS 3.1.20 or later, or 4.0.0 or later, or 5.0.0 or later.
The Story Behind Campaign #
We believe that while email marketing SaaS services such as MailChimp fill an important gap, they are not necessarily the best choice when your content already exists in a CMS. With Craft, your content can be beautifully modular and reusable, so why would you want to have to copy-paste and reformat content into an email? We believe that the entire experience of creating, sending and monitoring campaigns, as well as managing contacts and mailing lists, can and should belong in the CMS.
In 2012 we built and released FireMail for ExpressionEngine. FireMail allowed CMS users to send and monitor email campaigns, yet because of the technical limitations of the framework it was built on, it suffered in performance and scalability when used with large mailing lists. We toyed with the idea of building a similar plugin for Craft when it was released, yet it wasn’t until the major refactoring of Craft 3 that we decided that the time was right to build the Campaign plugin. As developers who care tenaciously about attention to detail, we wanted to ensure that we could build a plugin that we would love to use, and that’s exactly what we believe we ended up doing.
Usage #
To install the plugin, search for “Campaign” in the Craft Plugin Store, or install manually using composer.
composer require putyourlightson/craft-campaign
Setting Things Up #
- Turn on “Test Mode” to disable live sending of emails in Campaign → Settings → General Settings.
- Adjust your email settings in Campaign → Settings → Email Settings.
- Add any custom fields you would like to contacts in Campaign → Settings → Contact Settings.
- Enable GeoIP if you would like to geolocate contacts by their IP addresses in Campaign → Settings → GeoIP Settings.
- Create at least one campaign type in Campaign → Settings → Campaign Types.
- Create at least one mailing list type in Campaign → Settings → Mailing List Types.
- Create a cron job on your web server as explained in Campaign → Settings → General Settings.
Getting Started #
- Create a new campaign in Campaign → Campaigns.
- Create a new mailing list in Campaign → Mailing Lists.
- Add contacts to your mailing list using one or more of the following techniques:
- Create contacts in Campaign → Contacts and manually subscribe them in the Mailing Lists tab.
- Import contacts from a CSV file in Campaign → Contacts → Import.
- Import contacts from a user group in Campaign → Contacts → Import.
- Sync contacts from users by syncing a mailing list with a user group in Campaign → Contacts → Sync (Pro edition only).
- Create a new sendout in Campaign → Sendouts.
Testing #
Before sending to large mailing lists it is important to test that your campaign is correctly set up. By enabling on “Test Mode” in Campaign → Settings → General Settings, live sending of emails will be disabled and sendout emails will instead be saved into local files (in storage/runtime/mail) rather that actually being sent. You can also send a test email on both the campaign as well as the sendout edit page. Email testing services such as Mailtrap, which we highly recommend, can also be used for testing sendouts.
Email Delivery #
Campaign has its own email settings and can use any email delivery service that Craft supports. Craft natively supports Sendmail, SMTP and Gmail, and there are many plugins freely available which add third-party integrations (see “Mailer Transports” in the plugin store). SMTP can generally be used with most email delivery services, however using an API usually results in better performance, therefore the following plugins are recommended:
- Amazon SES by PutYourLightsOn
- MailerSend by Studio Espresso – Note that MailerSend has a daily request quota and rate limits.
- Mailgun by Pixel & Tonic
- Mandrill by Pixel & Tonic
- Postmark by Pixel & Tonic – Using broadcast message streams.
- SendGrid by PutYourLightsOn
Mailgun and Postmark are our email delivery services of choice for their ease of use and reliable deliverability.
Bounce and Complaint Handling #
Campaign includes webhooks to handle bounce and complain notifications for the following services:
- Amazon SES – The option to “Include original headers” must be enabled when configuring bounce and complaint handling via SNS topics.
- MailerSend
- Mailgun
- Mandrill
- Postmark – By default, Postmark adds its own unsubscribe link to all emails, which can result in double unsubscribe links. Ideally, only the unsubscribe link belonging to Campaign should exist, as it will then be able to show unsubscribe metrics in the reports. You have to contact Postmark directly to have its unsubscribe link removed, as per the last paragraph in this article.
- Sendgrid
To set up webhooks, copy the appropriate webhook URL from Campaign → Settings → General Settings and add it to the service you use (view each service’s documentation for instructions).
Multi-Site Functionality #
Campaign works with a multi-site set up by allowing campaigns, mailing lists, segments and sendouts to each be assignable to one and only one site. This enables the management of each of the above elements on a site by site basis.
Sending to Large Lists #
Since Campaign runs on your web server, email sending is restricted to the resources available to PHP. When sending to lists upwards of 10,000 contacts, an unoptimised sending process can take a long time to complete. Below are some strategies for handling speed and scalability when it comes to sending to large lists, all of which should ideally be used in combination for best results.
Server Resources #
Ensure that your server has sufficient resources allocated to PHP. At least 1GB of dedicated memory is recommended, the more the better. Traditional shared hosting (not including VPS hosting) is rarely if ever reliable enough to provide a smooth sending process.
Queue Running Process #
The sending process happens in a long-running queue job (see How Sendouts Are Sent). Queue jobs in Craft are run via control panel web requests by default, meaning that they are only run when a user is in the control panel and they are assigned limited memory and execution time (as defined by memory_limit and max_execution_time).
Running your queue jobs via a daemonised queue runner is highly recommended, allowing the send process to run smoother and for longer without timing out. Read more about Queue Runners and Custom Queues in Craft CMS.
Custom Queues #
Campaign allows you to specify a custom queue to add jobs to. The benefit of this is that long-running queue jobs will can run independently of queue jobs in Craft’s default queue.
Here’s how to configure Campaign to use a custom queue in /config/app.php.
return [
    'bootstrap' => ['customQueue'],
    'components' => [
        'plugins' => [
            'pluginConfigs' => [
                'campaign' => [
                    'queue' => 'customQueue',
                ],
            ],
        ],
        'customQueue' => [
            'class' => \craft\queue\Queue::class,
            'channel' => 'custom',
        ],
    ],
];
For a full explanation of when and how to use custom queues, read Queue Runners and Custom Queues in Craft CMS.
Template Caching #
Email campaigns are extremely flexible, allowing you to send a customised version to each contact. If there are parts of your campaign template that do not need to be dynamic then you can reduce their rendering time by caching those partials using Craft’s {% cache %} tag with the globally and using key parameters.
Hello {{ contact.firstName }},

{# Cache the last 10 entries. #}
{% cache globally using key 'campaign-' ~ campaign.id %}
    {% for entry in craft.entries.limit(10).all() %}
        {{ entry.title }}
    {% endfor %}
{% endcache %}
Email Templates #
Email templates are defined in the campaign type’s settings page. A HTML as well as a plaintext email template should be provided that exist in the site’s templates folder.
The following template tags are available to email templates: campaign, browserVersionUrl, contact, unsubscribeUrl
Sample Code #
The following sample code shows how the tags can be used. Checking for the existence of the tags will ensure that they are only output when not blank, as may be the case for test emails and web versions.
{% if browserVersionUrl %}
  <a href="{{ browserVersionUrl }}">View this email in your browser</a>
{% endif %}

{% if contact.firstName %}
  Hello {{ contact.firstName }},
{% endif %}

Welcome to this month's newsletter in which we have some fascintaing announcements!

{{ campaign.announcements }}

{% if unsubscribeUrl %}
  <a href="{{ unsubscribeUrl }}">Unsubscribe from this mailing list</a>
{% endif %}
View the example templates.
Designing Templates #
The majority of email clients either offer no support at all for CSS and floated elements or are inconsistent in how they display them, so email templates should be built using tables. Since designing, building and testing a reliable email template (that works in all email clients) can be a daunting, time-consuming task, we’ve collected some recommended resources that provide lots of useful information as well as some links to free tried-and-tested email templates that you can customise to your specific needs.
MJML #
We recommend using MJML, a markup language and framework for building responsive email templates. The free MJML desktop app makes coding email templates quick and easy. Watch the video below created by Philip Thygesen of Boomy.
The MJML plugin provides you with Twig tags to render email tempates. Using the MJML API to render email templates will significantly slow down the sending process due to latency, therefore we highly recommend using MJML only to generate the markup for your templates.
Frameworks #
Foundation for Emails 2 is a framework for building responsive email templates using CSS or SASS without having to code tables by hand.
https://get.foundation/emails
Guides #
A step-by-step guide to creating email templates by EmailMonks.
https://emailmonks.com/blog/email-coding/step-step-guide-create-html-email/
A comprehensive guide to coding email templates by Campaign Monitor.
https://www.campaignmonitor.com/dev-resources/guides/coding/
A complete guide to coding email template and email marketing in general by MailChimp (some things are specific to MailChimp).
https://templates.mailchimp.com/
The “Ultimate Guide to Email Optimization + Troubleshooting” by Litmus.
https://litmus.com/lp/email-optimization-tips
HTML Templates #
Zurb offers a range of free responsive HTML email templates that you can easily customise to match your site’s design.
https://zurb.com/playground/responsive-email-templates

Litmus offers a wide range of free HTML email templates that you can easily customise yourself or using the Litmus Builder.
https://litmus.com/community/templates

Testing #
A complete breakdown of the CSS support for the most popular mobile, web and desktop email clients.
https://www.campaignmonitor.com/css/
As well as offering many useful resources, Litmus allows you to design and test your email templates in all major email clients.
https://litmus.com/
Front-end Forms #
The following front-end forms are available so that you can allow contacts to take certain actions.
To avoid spam, we recommend you enable reCAPTCHA in Campaign → Settings → reCAPTCHA Settings or use the Snaptcha plugin.
Subscribe Form #
You can create a mailing list subscribe form as follows.
{% set mailingList = craft.campaign.mailingLists.id(7).one() %}

{# If there were any validation errors, a `contact` variable will be passed to the
   template, which contains the posted values and validation errors. If that’s not
   set, we’ll default to a new contact. #}
{% set contact = contact ?? create('putyourlightson\\campaign\\elements\\ContactElement') %}

<form id="subscribe-form" method="post">
    {{ csrfInput() }}
    {{ actionInput('campaign/forms/subscribe') }}
    {{ redirectInput('subscribe-success') }}
    {{ hiddenInput('mailingList', mailingList.slug) }}

    {# Specify a site ID – required only if the mailing list does not exist in the current site. #}
    {{ hiddenInput('siteId', 2) }}

    <label for="email">Email</label>
    <input id="email" type="email" name="email" value="{{ contact.email }}" required />
    {{ contact.getFirstError('email') }}

    <label for="firstName">First Name</label>
    <input id="firstName" type="text" name="fields[firstName]" value="{{ contact.firstName }}" required />
    {{ contact.getFirstError('firstName') }}

    <label for="lastName">Last Name</label>
    <input id="lastName" type="text" name="fields[lastName]" value="{{ contact.lastName }}" required />
    {{ contact.getFirstError('lastName') }}

    <label for="customFieldName">Other Custom Field</label>
    <input id="customFieldName" type="text" name="fields[customFieldName]" value="{{ contact.customFieldName }}" />
    {{ contact.getFirstError('customFieldName') }}

    {# Required if reCAPTCHA is enabled in the plugin settings. #}
    {{ craft.campaign.recaptcha }}

    <input type="submit" value="Subscribe" />
</form>
To submit the form using an AJAX request, you’ll need to send a POST request containing the form data. Here’s an example using the fetch API. See Craft’s controller action docs for more details.
<script>
    const form = $('#subscribe-form');
    const formData = $(form).serialize();
    fetch('/actions/campaign/forms/subscribe', {
        method: 'POST',
        headers: {
            'Accept': 'application/json',
        },
        body: formData,
    })
    .then(response => response.json())
    .then(result => {
        if (result.status == 200) {
            // Success
            alert('You have successfully subscribed to the mailing list.');
        }
        else {
            // Failure
            alert('Error subscribing to the mailing list.');
            console.log(result.errors);
        }
    });
</script>
Unsubscribe Form #
You should always make it possible for contacts to unsubscribe from a mailing list by providing them with an unsubscribe link in campaigns.
You can additionally create a mailing list unsubscribe form as follows. The Unsubscribe Form Allowed setting must be enabled in the mailing list type for this to work.
{% set mailingList = craft.campaign.mailingLists.id(7).one() %}

<form id="unsubscribe-form" method="post">
    {{ csrfInput() }}
    {{ actionInput('campaign/forms/unsubscribe') }}
    {{ redirectInput('unsubscribe-success') }}
    {{ hiddenInput('mailingList', mailingList.slug) }}

    {# Specify a site ID – required only if the mailing list does not exist in the current site. #}
    {{ hiddenInput('siteId', 2) }}

    <label for="email">Email</label>
    <input id="email" type="email" name="email" value="" required />

    {# Required if reCAPTCHA is enabled in the plugin settings. #}
    {{ craft.campaign.recaptcha }}

    <input type="submit" value="Unsubscribe" />
</form>
If you have contacts that are synced to users then you can provide them with a way to unsubscribe provided they are logged in.
{% set contact = craft.campaign.contacts.userId(currentUser.id).one() %}
{% set mailingLists = contact.getMailingLists() %}

{% for mailingList in mailingLists %}
    <form id="unsubscribe-form" method="post" action="">
        {{ csrfInput() }}
        <input type="hidden" name="action" value="campaign/contacts/unsubscribe-mailing-list" />
        <input type="hidden" name="contactId" value="{{ contact.id }}" />
        <input type="hidden" name="mailingListId" value="{{ mailingList.id }}" />

        <input type="submit" value="Unsubscribe" />
</form>
{% endfor %}
Contact Update Form #
You can create a contact update form to allow contacts to update their data (field values) and subscribed mailing lists as follows. Note that the contact’s cid and uid are both required in order to authenticate the request.
{% set contact = craft.campaign.contacts.userId(currentUser.id).one() %}

<form id="update-form" method="post">
    {{ csrfInput() }}
    {{ actionInput('campaign/forms/update-contact') }}
    {{ hiddenInput('cid', contact.cid) }}
    {{ hiddenInput('uid', contact.uid) }}

    <label for="firstName">First Name</label>
    <input id="firstName" type="text" name="fields[firstName]" value="{{ contact.firstName }}" required />

    <label for="lastName">Last Name</label>
    <input id="lastName" type="text" name="fields[lastName]" value="{{ contact.lastName }}" required />

    <label for="customFieldName">Other Custom Field</label>
    <input id="customFieldName" type="text" name="fields[customFieldName]" value="{{ contact.customFieldName }}" />

    <h3>Subscribed Mailing Lists:</h3>
    {% for mailingList in craft.campaign.mailingLists.all() %}
        <label for="{{ mailingList.slug }}">{{ mailingList.title }}</label>
        <input type="hidden" name="mailingList[{{ mailingList.id }}]" value="0">
        <input id="{{ mailingList.slug }}" type="checkbox" name="mailingList[{{ mailingList.id }}]" value="1" {{ contact.isSubscribedTo(mailingList) ? 'checked' }}>
    {% endfor %}

    {# Required if reCAPTCHA is enabled in the plugin settings. #}
    {{ craft.campaign.recaptcha }}

    <input type="submit" value="Update" />
</form>
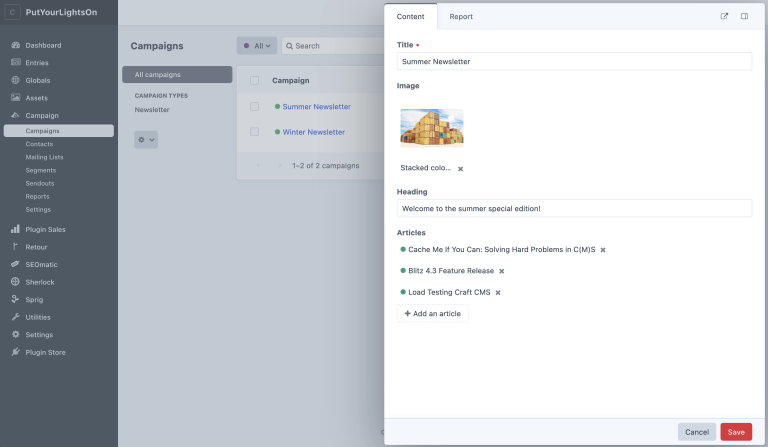
Campaigns #
Campaigns, just like entries, support drafts, revisions and have their own custom field layout, determined by the campaign type they belong to. They each have their own URL and work with live preview. A campaign can be sent to one or more mailing lists by creating and sending it via one or more sendouts.
Campaign Types #
Before you can create a campaign, you must create at least one campaign type. To create a new campaign type, go to Settings → Campaign Types and click the “New campaign type” button.
Each campaign type lets you define a custom field layout a well as the following settings.
Campaign URI Format #
What the campaign URIs should look like. You can include tags that output campaign properties.
campaign/{slug}
HTML Template #
The HTML template to use when a campaign’s URL is requested, located in Craft’s main templates folder.
_campaign/html
Plaintext Template #
The plaintext template to use when sending a plaintext version, located in Craft’s main templates folder.
_campaign/plaintext
Query String Parameters #
The query string parameters to append to links that are clicked in the campaign, useful for analytics.
Google Analytics example:
utm_source=campaign-plugin&utm_medium=email&utm_campaign={{ campaign.title }}
Default Test Contacts #
The default contacts to use for test emails (leave blank to use the currently logged in user).
Campaign Template Variables #
You have access to the following variables in your campaign templates.
campaign #
The current campaign.
contact #
The contact that received the campaign. This will be null if there is no contact, so you should always test for it in your templates before outputting properties.
sendout #
The sendout that sent the campaign. This will be null if there is no sendout, so you should always test for it in your templates before outputting properties.
browserVersionUrl #
The URL to the browser version of the campaign.
unsubscribeUrl #
The URL to unsubscribe from the mailing list that the campaign was sent to.
<h1>{{ campaign.title }}</h1>

{% if contact %}
    <p>Hello {{ contact.name }}</p>
{% endif %}

{{ campaign.body }}

<a href="{{ browserVersionUrl }}">View this email in your browser</a>

{% if unsubscribeUrl %}
    <a href="{{ unsubscribeUrl }}">Unsubscribe here</a>
{% endif %}
Getting Campaigns #
You can get campaigns from your templates with craft.campaign.campaigns which returns an Element Query.
// Gets all campaigns that are of the specified campaign type
{% set campaigns = craft.campaign.campaigns.campaignType('newsletter').all() %}

{% for campaign in campaigns %}
   <a href="{{ campaign.url }}">{{ campaign.title }}</a>
{% endfor %}
You can get campaigns from your plugin with CampaignElement::find() which returns an Element Query.
use putyourlightson\campaign\elements\CampaignElement;

$campaigns = CampaignElement::find()->campaignType('newsletter')->all();
In addition to supporting the parameters that all element queries in Craft support (id, slug, status, orderBy, etc.), the returned CampaignElementQuery class also supports the following parameters.
campaignType #
Only fetch campaigns that belong to a given campaign type(s). Accepted values include a campaign type handle, an array of campaign type handles, or a CampaignTypeModel object.
campaignTypeId #
Only fetch campaigns that belong to a given campaign type(s), referenced by its ID.
Outputting Campaigns #
In addition to having the properties that all element types in Craft have (id, title, etc.), campaigns also have their own unique public properties and methods, discoverable in the CampaignElement class.
Contacts #
Contacts support drafts and have their own custom field layout. They can be subscribed to one or more mailing lists and can be segmented using segments. They can be imported from CSV files and user groups, exported in CSV format and synced to users.
Creating Contacts #
To create a new contact manually, go to the Contacts page and click the “New contact” button. Once saved, you can then manually subscribe or unsubscribe the contact from mailing lists in the Mailing Lists tab of the contact edit page.
To import contacts in bulk, go to Contacts → Import and select a CSV file or a user group to import from.
To export contacts to a CSV file, go to Contacts → Export and select one or more mailing lists, as well as the fields, to export.
To sync contacts with users, go to Contacts → Sync and select a mailing list and user group to sync. Every time a user in the selected user group is created, updated or deleted, the contact in the synced mailing list will also be created, updated or removed accordingly. All custom fields that exist for contacts will be populated from the user fields. If you want users’ full names (or first and last names) to be synced then you should create custom fields with the handles fullName (or firstName and lastName) respectively and assign them to contacts before performing the sync. Note that the sync happens in one direction only, so modifications to contacts will not affect users.
Getting Contacts #
You can get contacts from your templates with craft.campaign.contacts which returns an Element Query.
// Gets the first contact with the specified email address
{% set contact = craft.campaign.contacts.email('[email protected]').one() %}

{% if contact %}
   <a href="mailto: {{ contact.email }}">{{ contact.name }}</a>
{% endif %}
You can get contacts from your plugin with ContactElement::find() which returns an Element Query.
use putyourlightson\campaign\elements\ContactElement;

$contact = ContactElement::find()->email('[email protected]')->one();
In addition to supporting the parameters that all element queries in Craft support (id, slug, status, orderBy, etc.), the returned ContactElementQuery class also supports the following parameters.
userId #
Only fetch a contact that is synced to the given user ID.
cid #
Only fetch a contact with the given CID (unique contact ID).
email #
Only fetch a contact with the given email address.
mailingListId #
Only fetch contacts with the given mailing list ID.
segmentId #
Only fetch contacts with the given segment ID.
Outputting Contacts #
In addition to having the properties that all element types in Craft have (id, title, etc.), contacts also have their own unique public properties and methods, discoverable in the ContactElement class.
Mailing Lists #
Mailing lists support drafts and have their own custom field layout, determined by the mailing list type they belong to. They can contain an unlimited number of subscribed contacts.
Mailing List Types #
Before you can create a mailing list, you must create at least one mailing list type. To create a new mailing list type, go to Settings → Mailing List Types and click the “New mailing list type” button.
Each mailing list type lets you define a custom field layout a well as the following settings.
Subscribe Verification Required #
Whether the contact needs to verify their email address by clicking on a link in a verification email that will be sent to them after submitting a subscribe form (highly recommended).
Subscribe Verification Email Subject #
The subject to use for the verification email that is sent to contacts who submit a subscribe form (leave blank for default subject).
Subscribe Verification Email Template #
The template to use for the verification email that is sent to contacts who submit a subscribe form (leave blank for default message template). Available template tags: message, url, mailingList, pendingContact. Note that custom fields on the pending contact must be accessed via the fieldData property.
Hello {{ pendingContact.fieldData.firstName }},

Please verify your email address by clicking on the following link:
{{ url }}
Subscribe Success Template #
The template to use when a contact successfully subscribes to a mailing list (leave blank for default message template). Available template tags: message, mailingList.
Unsubscribe Form Allowed #
Whether contacts are allowed to unsubscribe themselves through an unsubscribe form.
Unsubscribe Success Template #
The template to use when a contact successfully unsubscribes from a mailing list (leave blank for default message template). Available template tags: message, mailingList.
Getting Mailing Lists #
You can get mailing lists from your templates with craft.campaign.mailingLists which returns an Element Query.
// Gets the first mailing list with the specified ID
{% set mailingList = craft.campaign.mailingLists.id(7).one() %}

{% if mailingList %}
   Subscribe to {{ mailingList.title }}
{% endif %}
You can get mailing lists from your plugin with MailingListElement::find() which returns an Element Query.
use putyourlightson\campaign\elements\MailingListElement;

$mailingList = MailingListElement::find()->id(7)->one();
In addition to supporting the parameters that all element queries in Craft support (id, slug, status, orderBy, etc.), the returned MailingListElementQuery class also supports the following parameters.
mailingListType #
Only fetch mailing lists that belong to a given mailing list type(s). Accepted values include a mailing list type handle, an array of mailing list type handles, or a MailingListTypeModel object.
mailingListTypeId #
Only fetch mailing lists that belong to a given mailing list type(s), referenced by its ID.
Outputting Mailing Lists #
In addition to having the properties that all element types in Craft have (id, title, etc.), mailing lists also have their own unique public properties and methods, discoverable in the MailingListElement class.
Segments #
Segments (Pro edition only) are sets of conditions that allow you to filter contacts by specific fields, operators and values. They can contain an unlimited amount of condition rules, including the ability to define your own condition rules, that are then applied to sendouts.
Segment Types #
The types of conditions available to segments are determined by the segment type they belong to.
Regular #
With regular segments, you can use the condition builder to add as many condition rules as you like. Each supported contact field offers a different operator and value format, for example plaintext fields allow string comparisons while date fields allow date comparisons.

Contact Condition Rules #
In addition to the provided condition rules, you can create and register your own condition rules using a custom module or plugin.
use Craft;
use craft\base\conditions\BaseCondition;
use craft\events\RegisterConditionRuleTypesEvent;
use putyourlightson\campaign\elements\conditions\contacts\ContactCondition;
use yii\base\Event;

Event::on(
    ContactCondition::class,
    BaseCondition::EVENT_REGISTER_CONDITION_RULE_TYPES,
    function (RegisterConditionRuleTypesEvent $event) {
        $event->conditionRuleTypes[] = MyCustomConditionRule::class;
    }
);
View the example module and segment conditions.
Legacy #
With legacy segments (previously regular segments), conditions can be combined by logical AND and OR operators in order to create a very unique segmentation of contacts.

While legacy segments are still supported, they will be removed in the next major version of Campaign, so you should ideally migrate them to regular segments.
Template #
Template segments provide a textarea in which you can add as much twig template code as you want. The template should output a string that evaluates to true (anything except for 0 or a blank string). The contact tag is available in this context.
{{ contact.dateOfBirth|date('Y') == 1980 ? 1 : 0 }}
Note that template conditions require processing template code for every contact and can therefore slow down the sending process. Use them sparingly and only when a regular segment is insufficient.
While template segments are still supported, they will be removed in the next major version of Campaign, so you should ideally migrate them to regular segments.
Getting Segments #
You can access segments from your templates with craft.campaign.segments which returns an Element Query.
// Gets the first segment with the specified ID
{% set segment = craft.campaign.segments.id(3).one %}

{% if segment %}
   Segment {{ segment.title }}
{% endif %}
You can get segments from your plugin with SegmentElement::find() which returns an Element Query.
use putyourlightson\campaign\elements\SegmentElement;

$segment = SegmentElement::find()->id(3)->one();
The returned SegmentElementQuery class supports the parameters that all element queries in Craft support (id, slug, status, orderBy, etc.)
Outputting Segments #
In addition to having the properties that all element types in Craft have (id, title, etc.), segments also have their own unique public properties and methods, discoverable in the SegmentElement class.
Sendouts #
Sendouts are how you send campaigns to your mailing lists. Sendouts can be sent immediately, on a scheduled date and time, or at a specific delayed interval after a contact subscribes to a mailing list.
Sendout Types #
The time at which sendouts are sent is determined by the sendout type they belong to.
Regular #
Regular sendouts are queued for sending immediately after being saved and sent.
Scheduled #
Scheduled sendouts allow you an exact date and time on which to send a campaign. As soon as the send date is reached, the sendout will be queued for sending.

Note: Scheduled sendouts require that you create a cron job as described in Settings → General Settings.
Automated #
Automated sendouts (Pro edition only) allow you to automate the delayed sending of a campaign to contacts, a specific amount of time after they subscribe to one or more mailing lists. As soon as the delayed period of time has passed, the sendout will be automatically queued for sending according to the schedule that you set.

Note: Automated sendouts require that you create a cron job as described in Settings → General Settings.
Recurring #
Recurring sendouts (Pro edition only) allow you to automate the sending of a campaign to contacts on a recurring schedule. You must consider and select whether the sendout can be sent to contacts multiple times. The sendout will be automatically queued for sending according to the schedule that you set.

Note: Recurring sendouts require that you create a cron job as described in Settings → General Settings.
Singular #
Singular sendouts (Pro edition only) allow you to send campaigns to one or more individual contacts, without requiring them to be subscribed to a mailing lists. This is useful when you want to send personalised campaigns to specific people.
Sendout Condition Rules #
Both automated and recurring sendouts allow you to provide your own condition rules. Only if all rules pass will the sendout actually be sent.
You can create and register your own condition rules using a custom module or plugin.
use Craft;
use craft\base\conditions\BaseCondition;
use craft\events\RegisterConditionRuleTypesEvent;
use putyourlightson\campaign\elements\conditions\sendouts\SendoutScheduleCondition;
use yii\base\Event;

Event::on(
    SendoutScheduleCondition::class,
    BaseCondition::EVENT_REGISTER_CONDITION_RULE_TYPES,
    function (RegisterConditionRuleTypesEvent $event) {
        $event->conditionRuleTypes[] = MyCustomConditionRule::class;
    }
);
View the example module and sendout conditions.
How Sendouts Are Sent #
Once a sendout is queued for sending, it will begin sending the next time that the queue is run. If Craft’s runQueueAutomaticallyconfig setting is set to true (the default value), then this will happen immediately, otherwise it will happen the next time the queue is run (initiated from a cron job, for example). The sendout is sent in a background process, so the site will remain usable for all visitors.
The sending process will ensure that only a single email is sent to each contact, even if some of those contacts are subscribed to multiple mailing lists selected in the sendout. This applies to all sendout types except for recurring sendouts that allow sending to contacts multiple times in the sendout’s settings.
Running Pending Sendouts #
Sendouts that are not immediately sent (scheduled, automated or recurring), require a cron job in order to be queued and run at the appropriate time. If you plan on using these sendout types then you should create a cron job to run pending sendouts on a scheduled basis (every 10 minutes for example). Change php to your PHP path (if different) and /path/to/project to your Craft project path.
*/10 * * * * php /path/to/project/craft campaign/sendouts/run
Warning: when using the console command, the
@webalias is unavailable and will return a blank string. For that reason, is it better to avoid using the@webalias in your site and asset volume settings.
You can run pending sendouts with a controller action through a unique URL, see Settings → General Settings. You can also manually run pending sendouts at any time using the utility at Utilities → Campaign.
A console command can also be used to queue and run pending sendouts:
php craft campaign/sendouts/run
Or if you want to only queue pending sendouts:
php craft campaign/sendouts/queue
Batch Sending #
In order to avoid timeouts or memory limits being exceeded while sending, sendouts are sent in batched queue jobs. The sendout job batch size and batch delay can be defined in Campaign → Settings → Sendout Settings.
This can also be useful if your email delivery service throttles how many emails can be sent within a certain amount if time. If the limit is 100 emails per minute, for example, then you could set the batch size to 100 and the batch delay to 60, to (conservatively) ensure that the sendout never gets throttled.
Getting Sendouts #
You can access sendouts from your templates with craft.campaign.sendouts which returns an Element Query.
// Gets all sendouts that were sent to the campaign with the specified ID
{% set sendouts = craft.campaign.sendouts.sendoutType('sent').campaignId(5).all %}

{% for sendout in sendouts %}
   {{ sendout.title }} sent on {{ sendout.sendDate|date }}
{% endfor %}
You can get sendouts from your plugin with SendoutElement::find() which returns an Element Query.
use putyourlightson\campaign\elements\SendoutElement;

$sendouts = SendoutElement::find()->sendoutType('sent')->campaignId(5)->all();
In addition to supporting the parameters that all element queries in Craft support (id, slug, status, orderBy, etc.), the returned SendoutElementQuery class also supports the following parameters.
sid #
Only fetch sendouts with the given SID (unique sendout ID).
sendoutType #
Only fetch sendouts with the given sendout type (regular / scheduled / automated).
campaignId #
Only fetch sendouts with the given campaign ID.
mailingListId #
Only fetch sendouts with the given mailing list ID.
segmentId #
Only fetch sendouts with the given segment ID.
Outputting Sendouts #
In addition to having the properties that all element types in Craft have (id, title, etc.), sendouts also have their own unique public properties and methods, discoverable in the SendoutElement class.
Integrations #
You can easily integrate your plugin with Campaign by using any of the available elements in src/elements or the service classes in src/services.
Getting/Creating a Contact #
Before creating a contact, you should always check if one already exists with the same email address.
use putyourlightson\campaign\Campaign;
use putyourlightson\campaign\elements\ContactElement;

$contact = Campaign::$plugin->contacts->getContactByEmail('[email protected]');

if ($contact === null) {
    $contact = new ContactElement();
    $contact->email = '[email protected]';
    $contact->customFieldName = $customFieldValue;
}

Craft::$app->getElements()->saveElement($contact)
Subscribing a Contact #
You can create and subscribe a contact to a mailing list using the FormService::createAndSubscribe() method (added in Campaign version 2.1.0), which respects the mailing list’s subscribeVerificationRequired setting.
use putyourlightson\campaign\Campaign;
use putyourlightson\campaign\elements\MailingListElement;

$mailingList = MailingListElement::find()->slug($mailingListSlug)->one();

if ($mailingList === null) {
    throw new NotFoundHttpException('Mailing list not found');
}

$fieldValues = Craft::$app->getRequest()->getBodyParam('fields');
$source = Craft::$app->getRequest()->getReferrer();

Campaign::$plugin->forms->createAndSubscribeContact($email, $fieldValues, $mailingList, 'web', $source);
See this Campaign integration for Formie for a detailed example.
Unsubscribing a Contact #
You can unsubscribe a contact from a mailing list using the FormService::unsubscribeContact() method.
use putyourlightson\campaign\Campaign;
use putyourlightson\campaign\elements\MailingListElement;

$contact = Campaign::$plugin->contacts->getContactByEmail($email);
$mailingList = MailingListElement::find()->slug($mailingListSlug)->one();

Campaign::$plugin->forms->unsubscribeContact($contact, $mailingList);
Data Privacy #
Campaign gives you full control over your contacts, which can be soft deleted or permanently deleted at any time. Soft deleting a contact will result in them only appearing when filtering by Trashed contacts, as with any element type. After the soft delete duration has passed, Craft’s garbage collection will permanently remove all of the contact’s data and activity from the database.
You can enable anonymous tracking of contact interactions under Contact Settings, making it easier to comply with stricter privacy policies. With this setting enabled, individual contact interactions will not be recorded, however the number of clicks and opens will still be available in campaign reports. In addition to this setting, the campaign/reports/anonymize console command anonymizes all previously collected personal data.
In addition to any custom fields that you have created and assigned to contacts, the Campaign plugin stores campaign and mailing list activity about contacts, as well as the following data.
email #
The contact’s email address.
country #
The country that the contact was last active from (if GeoIP is enabled).
geoIp #
The GeoIP location that the contact was last active from (if GeoIP is enabled), specifically:
continentCode, continentName, countryCode, countryName, regionCode, regionName, city, postCode, timeZone
device #
The device that the contact was last active from.
os #
The OS (operating system) that the contact was last active from.
client #
The web browser client that the contact was last active from.
lastActivity #
A timestamp of the contact’s last activity.
complained #
A timestamp of the contact’s spam complaint.
bounced #
A timestamp of the contact’s bounced email.
verified #
A timestamp of the contact’s verified email (through double opt-in).
Have a suggestion to improve the docs? Create an issue with details, and we'll do our best to integrate your ideas.